
2025-08-14 22:16
Current location:Home > hydraulic cylinder seal kits >
hydraulic cylinder seal kits

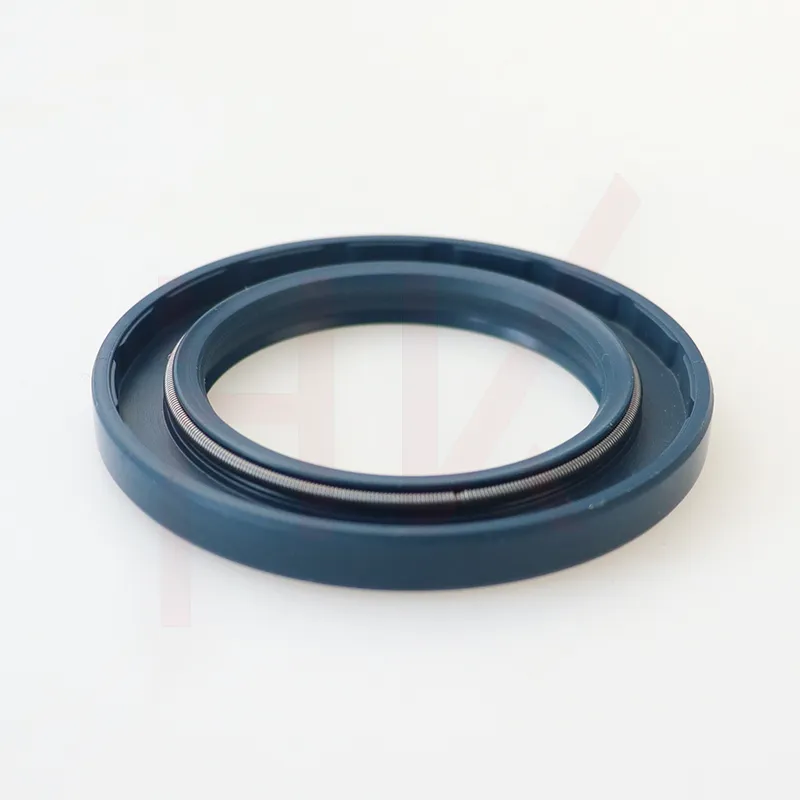
Regular maintenance and inspection of the outer hub oil seal are essential to prevent potential issues

outer hub oil seal. Over time, the seal can wear out or become damaged due to exposure to extreme temperatures, moisture, and debris. If the seal is compromised, it should be replaced as soon as possible to avoid further damage to the wheel assembly.
outer hub oil seal. Over time, the seal can wear out or become damaged due to exposure to extreme temperatures, moisture, and debris. If the seal is compromised, it should be replaced as soon as possible to avoid further damage to the wheel assembly.
...

2025-08-14 21:44


2025-08-14 21:22


2025-08-14 21:12

One of the primary characteristics of high temperature oil seals is their ability to maintain flexibility and resilience at elevated temperatures. Traditional rubber seals may become brittle and lose their sealing capabilities when exposed to heat. In contrast, high temperature oil seals retain their mechanical properties, ensuring that they continue to perform their sealing function effectively even in harsh conditions. Typically, these seals can withstand temperatures ranging from 150°C to over 300°C, depending on the specific material used.
high temperature oil seal
...

2025-08-14 19:52

Latest articles
Choosing the correct hydraulic cylinder oil seal kit is essential for optimal performance
. Here are key factors to considerRotary shaft oil seals come in a variety of designs and materials to suit different applications and environments. Common materials used in the construction of oil seals include rubber, silicone, polyurethane, and fluorocarbon. Each material has its own unique properties that make it suitable for specific operating conditions, such as high temperatures, high pressures, or exposure to harsh chemicals.
3. **Installing the Fastener** With the anchor in place, screw in the provided bolt or threaded rod using a wrench or socket **Installing the Fastener** With the anchor in place, screw in the provided bolt or threaded rod using a wrench or socket **Installing the Fastener** With the anchor in place, screw in the provided bolt or threaded rod using a wrench or socket **Installing the Fastener** With the anchor in place, screw in the provided bolt or threaded rod using a wrench or socketinstalling butterfly anchors. As you turn the fastener, the anchor's wings will expand, pressing against the inner walls of the hole. Continue turning until the fastener is snug but not overly tight. Over-tightening can potentially damage the anchor or reduce its holding capacity.
**Installing the Fastener** With the anchor in place, screw in the provided bolt or threaded rod using a wrench or socket **Installing the Fastener** With the anchor in place, screw in the provided bolt or threaded rod using a wrench or socketinstalling butterfly anchors. As you turn the fastener, the anchor's wings will expand, pressing against the inner walls of the hole. Continue turning until the fastener is snug but not overly tight. Over-tightening can potentially damage the anchor or reduce its holding capacity.The 1 2 indicates the dimensions of the anchor plate. It could mean a 1 by 2-inch rectangular plate or a 1.2-inch thick plate, depending on the context2-inch thick plate, depending on the context 2-inch thick plate, depending on the context2-inch thick plate, depending on the context5 8 x 4 1 2 strong bolt 2 anchor. Regardless, the plate's purpose is to distribute the load from the bolts evenly onto the substrate, preventing localized stress and potential damage.
2-inch thick plate, depending on the context2-inch thick plate, depending on the context5 8 x 4 1 2 strong bolt 2 anchor. Regardless, the plate's purpose is to distribute the load from the bolts evenly onto the substrate, preventing localized stress and potential damage.